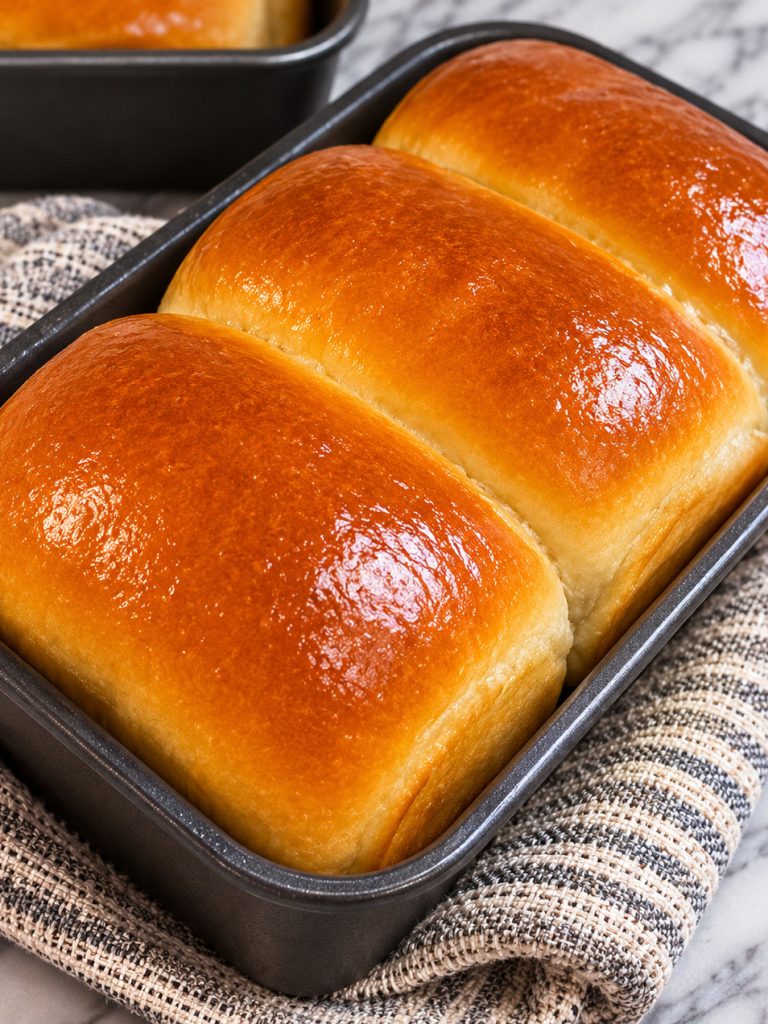
Prep Time: 30 minutesCook Time: 30 minutesTotal Time: 295 minutesYield: 20 slices (Two standard sandwich loaves, each cut into 10 generous slices; one serving is one slice, approximately 75 grams baked.)
Ingredients
2 1/4 teaspoons active dry yeast 1 standard 7-gram packet; dry, unexpired, and at room temperature
1 teaspoon granulated sugar 4 grams; for blooming the yeast
1 pinch ground ginger About 1/16 teaspoon or 0.2 gram
1/4 cup water 60 ml; warmed to 105–110°F (40–43°C)
2 cups cultured buttermilk 480 ml; whole or low-fat, shaken well and gently warmed to 105–110°F (40–43°C)
1/3 cup honey 113 grams; pure liquid clover or wildflower honey at room temperature
3/4 teaspoon baking soda 3.6 grams; dry and lump-free
3/4 teaspoon fine sea salt 4.5 grams; fine-grained table salt may be used, or 1 teaspoon fine kosher salt
1/4 cup unsalted butter for the dough 4 tbsp or 57 grams; melted and cooled to 100–105°F (38–41°C)
6 cups unbleached bread flour 750 grams total; fluff, spoon, and level if measuring by volume; divide into two 3-cup portions
1–2 tablespoons unsalted butter for finishing 14–28 grams; melted and kept warm for brushing the hot baked loaves
Instructions
Combine the warm water, sugar, ground ginger, and active dry yeast in the stand-mixer bowl. Stir gently and leave undisturbed for 5–7 minutes. A visible, opaque foam layer should form. If the mixture remains flat, discard it and restart with fresh yeast and water at the correct temperature.
In a measuring pitcher, whisk the warmed cultured buttermilk, honey, baking soda, and salt until blended. A little fizz is normal. Pour the mixture into the foamy yeast.
Add the first 3 cups (375 grams) of bread flour. With the paddle attachment, mix on low speed for about 3 minutes until the mixture becomes smooth and no dry flour pockets remain.
Pour in the melted dough butter, cooled to 100–105°F (38–41°C), and mix until no oily streaks remain. Switch to the dough hook. Add the remaining 3 cups (375 grams) of flour gradually, about 1 cup at a time, allowing each addition to absorb before adding the next.
Knead with the dough hook on low speed for 6–8 minutes, until the dough is smooth, elastic, and pulls away from the mixer sides while remaining slightly attached at the bottom. Check a small piece by stretching it gently into a thin, translucent windowpane. For hand kneading, work the dough on a lightly floured surface for 8–10 minutes until it reaches the same condition.
Shape the dough into a ball and transfer it to a lightly oiled large bowl, turning once to coat. Cover with a damp towel or plastic wrap. Leave in a draft-free place at 75–80°F (24–27°C) for approximately 90 minutes, until doubled in volume. Use the increase in volume, rather than the clock alone, to judge readiness.
Grease two metal loaf pans. Gently deflate the risen dough and transfer it to a clean, lightly oiled surface. Divide it into two equal portions with a bench scraper. Pat or roll each portion into an 8-by-12-inch rectangle. Starting at a short edge, roll tightly into a cylinder, pinch the long seam closed, tuck in the ends, and center each loaf seam-side down in its prepared pan.
Lightly brush or spray the shaped dough surfaces with a little neutral oil or melted butter used for pan preparation. Cover the pans loosely with a clean towel. Proof for approximately 40–45 minutes, until each rounded crown rises about 1 inch above the pan rim. Press a floured finger gently about 1/2 inch into the dough: a ready loaf should recover roughly halfway within 2–3 seconds. If the dent springs back immediately, allow another 5–10 minutes; if it stays fully sunken, bake promptly.
During the final proof, preheat the oven to 375°F (190°C) using conventional bake, with the rack in the lower-middle position. Place the pans on the rack with 2–3 inches of clearance between them. Bake for approximately 28–32 minutes. At 18–20 minutes, inspect the crusts. If they are already deep golden amber, loosely tent the tops with aluminum foil and continue baking.
Check the center of each loaf with an instant-read thermometer inserted diagonally through the upper side. Remove the loaves when the center reads 196–200°F (91–93°C). A golden crust and a hollow sound when the bottom is tapped are supporting signs, but neither replaces the thermometer. If the center is below 196°F, continue baking and check again.
For the standard soft sandwich crust, immediately brush the hot loaf crowns with 1–2 tablespoons of melted butter. Rest the loaves in their pans for 10 minutes. Loosen the edges carefully, remove the loaves, and place them upright on a wire cooling rack. Drape a clean, dry cotton towel over them to soften the crust as steam escapes.
Leave the loaves on the rack for at least 90 additional minutes, until completely cooled, before cutting with a serrated bread knife. For an optional firmer, golden crust instead of the standard soft finish, omit the post-bake butter and cooling towel and cool the loaves uncovered.
Notes
Yield: Two standard sandwich loaves, each cut into 10 generous slices. One serving is one slice, approximately 75 grams baked.
Equipment: Heavy-duty stand mixer with paddle and dough-hook attachments, or a large mixing bowl and sturdy wooden spoon for hand mixing; two greased heavy-gauge metal loaf pans; instant-read digital thermometer; bench scraper; lightly oiled bowl; measuring equipment and kitchen scale; pastry brush; clean lint-free cotton towels; plastic wrap; wire rack; serrated bread knife; optional rolling pin; and aluminum foil.
The dough should be smooth and elastic, with mostly clean mixer sides and slight attachment at the bottom. Avoid adding excess flour simply to make the bowl completely clean.
Use the approximately 1-inch crown height and halfway-recovering finger dent together to judge the second proof.
The internal center temperature of 196–200°F (91–93°C) is the deciding doneness measurement. Crust color and hollow tapping are secondary signs.
For a softer sandwich crust, use the finishing butter and dry cotton towel. For a firmer golden crust, omit both and cool uncovered.
Unbleached all-purpose flour may replace the bread flour 1:1 by weight, using 750 grams. The loaf may have slightly less oven spring and a softer, more delicate crumb.
If cultured buttermilk is unavailable, combine 2 scant cups (450 milliliters) whole milk with 2 tablespoons (30 milliliters) lemon juice or distilled white vinegar. Rest for 10 minutes until lightly curdled, then gently warm to 105–110°F (40–43°C). The crumb may be slightly less rich and velvety.
For instant yeast, substitute 2¼ teaspoons (7 grams). Skip the bloom. Mix the instant yeast, ginger, sugar, and baking soda into the first 3 cups of flour. Combine the warm water, buttermilk, honey, and melted butter separately, then mix with the dry ingredients. Incorporate the remaining flour and knead as directed. Begin checking the first rise approximately 15 minutes earlier, using doubled volume as the deciding cue.
For 24 pull-apart dinner rolls, divide the dough after its first rise into 24 equal pieces, approximately 60 grams of raw dough each. Form taut balls and arrange 12 in each of two buttered 9-by-13-inch metal pans in a 3-by-4 arrangement, or use two 9-inch round pans. Proof for 30–35 minutes until puffy. Bake at 375°F (190°C) for 18–22 minutes, checking for a center temperature of 195°F (91°C). Brush with melted butter after baking.
For salt, substitute ¾ teaspoon fine table salt or 1 teaspoon fine kosher salt for the ¾ teaspoon fine sea salt.
Store completely cooled bread at room temperature in a paper bread bag, linen bag, or airtight bread box for up to 3 days. Avoid refrigeration.
For freezing, wrap cooled whole loaves or individual slices in two layers of plastic wrap followed by heavy-duty aluminum foil. Freeze for up to 3 months. Thaw wrapped bread at room temperature for approximately 2 hours, or toast frozen slices directly.
For overnight preparation, shape the loaves into their pans, cover tightly, and refrigerate for 8–12 hours. Allow approximately 60–90 minutes at room temperature the next morning, or until the crowns and finger-dent response indicate readiness, before baking.
Per-slice nutrition figures are source-provided estimates for a 20-slice yield.