
No oven? No stress. These No Bake Fudge Bombs are the chocolate fix you didn’t know you needed. They come together in minutes, require zero baking, and have that chewy truffle texture with a surprise gooey center. Think of them as a hybrid between a rich brownie bite and a melt in your mouth truffle. Whether you’re prepping for a party, storing sweet snacks in the fridge, or just satisfying that late night craving, these fudge bombs deliver big chocolate flavor with tiny effort.
Why You’ll Love These Fudge Bombs
- No bake and no fuss – Just mix, chill, and roll.
- Gooey center – Chocolate spread inside gives that irresistible molten bite.
- Deep chocolate flavor – Thanks to real cocoa powder and biscuit richness.
- Customizable – Use any spread or biscuit type you like!
Ingredients You’ll Need
| Ingredient | Amount |
|---|---|
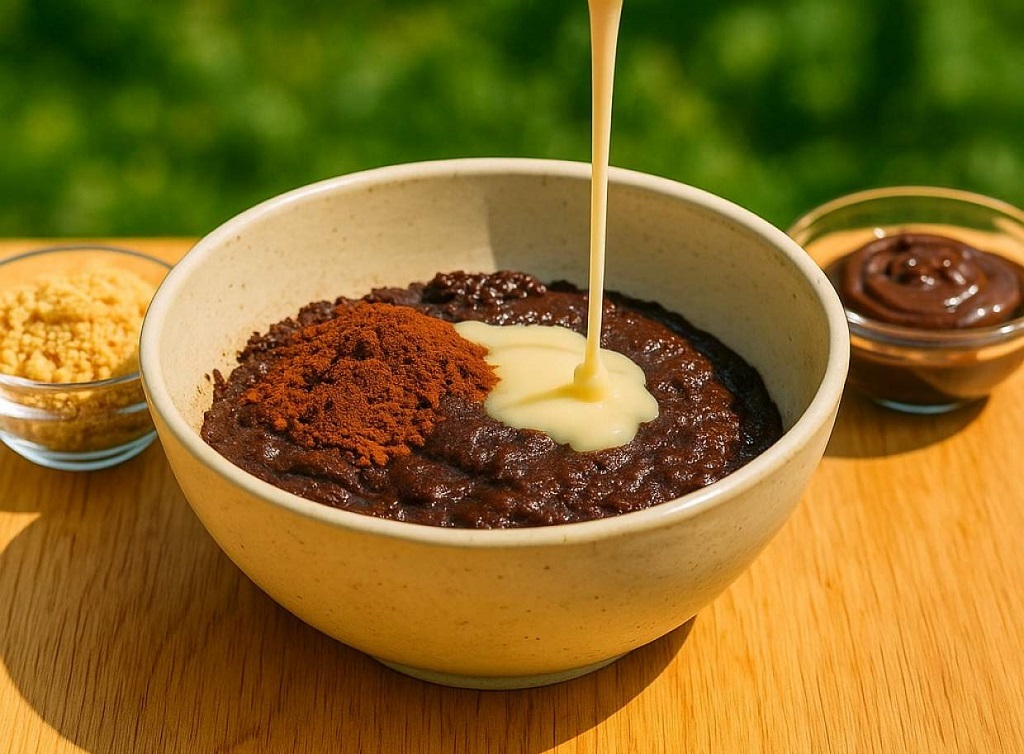
| Crushed biscuits (digestives or Oreos) | 200g |
| Unsweetened cocoa powder | 3 tbsp (+ more for rolling) |
| Sweetened condensed milk | 150g |
| Chocolate spread (e.g. Nutella) | For filling |
Step by Step to Make Fudge Bombs
1: Prep Your Ingredients
- Crush the biscuits into fine crumbs using a food processor or by sealing them in a zip bag and rolling with a pin.
- Sift the cocoa powder to avoid clumps and measure out your condensed milk.
2: Combine the Dough
- In a large bowl, mix the crushed biscuits and cocoa powder until evenly blended.
- Pour in the condensed milk and stir until it forms a sticky dough. It should be thick but pliable add a little more biscuit crumb if it’s too wet.
3: Shape the Bombs
- Take a small piece of dough and flatten it in your palm.
- Add a ½ tsp of chocolate spread in the center, then wrap the dough around it and roll it into a smooth ball.
- Repeat with the remaining dough, placing each fudge bomb on a plate or tray.
4: Coat and Chill
- Roll each ball in extra cocoa powder to finish.
- Chill in the fridge for 30 minutes to firm up before serving.
“I tested this recipe during a heatwave when I couldn’t bear to turn on the oven. These fudge bombs saved the day rich, chocolatey, and gone in seconds.”
Chef’s Tips for Success
- Use soft biscuit crumbs – Digestives, graham crackers, or Oreos give the best texture.
- Chill the filling – If your chocolate spread is too runny, refrigerate it a bit to make stuffing easier.
- Want extra texture? – Stir in finely chopped nuts or mini chocolate chips before shaping.
- Roll hands lightly oiled – This prevents sticking while shaping the balls.
Pair These with Other Treats
- Serve with salted eggless cookies for a crunchy contrast.
- Pair with flourless oat bread if you’re making a dessert platter.
- Drizzle with homemade maple syrup for a sweet upgrade.
Flavor Variations You Can Try
- Peanut Butter Core: Swap the chocolate spread with creamy peanut butter or almond butter. It adds a salty contrast to the sweetness of the dough.
- Coconut Dream: Mix shredded coconut into the dough and roll the fudge bombs in toasted coconut instead of cocoa powder.
- Mint Chocolate: Add a few drops of peppermint extract to the dough and fill with mint chocolate spread or a square of mint chocolate.
- Hazelnut Crunch: Add crushed hazelnuts to the dough and use a chunk of hazelnut chocolate in the center.
Make It Dairy Free or Vegan
- Use vegan condensed milk, now available in most grocery stores or online.
- Choose dairy free biscuits and a vegan chocolate spread.
- The texture remains just as chewy and rich perfect for all diets.
Tips for Storing and Freezing
- Refrigerator: Store in an airtight container for up to 7 days. The texture stays chewy and firm when chilled.
- Freezer: These fudge bombs freeze beautifully. Freeze on a tray, then transfer to a zip bag. Thaw at room temperature or eat slightly cold for a firmer bite.
- Tip: Wrap each ball in parchment if you’re storing them long term to avoid sticking.
Troubleshooting Guide
- Dough too dry? Add 1-2 tsp of condensed milk and mix again until it holds shape.
- Dough too wet? Add extra crushed biscuits or a spoon of cocoa powder to thicken it.
- Spreading while shaping? Chill the dough for 10-15 minutes before working with it again.
- Chocolate filling leaks out? Make sure the center is sealed completely by pinching and rolling tightly.
“These are my emergency fridge treats. I make a batch every Sunday and pop one whenever a sweet craving hits. They’re also a hit at parties no one believes they’re no bake.”
Serve It Like a Pro
- Place fudge bombs in mini cupcake liners for a polished presentation at parties.
- Dust with cocoa, powdered sugar, or edible glitter before serving.
- Plate alongside raspberry swirl cookies for color and flavor contrast.
More Easy No Bake Favorites
- Microwave Bread in a Jar – Another 5-minute sweet fix with zero baking needed.
- Banana Oat Pancakes – Great to serve on a brunch board next to these fudge bombs.
- 1-Egg Yogurt Dessert – Light and creamy to balance out the fudge richness.
- Cocoa Banana Oat Dessert – Another healthy no bake chocolate treat!
Why I Love This Recipe
Some of the best desserts I’ve made come from simple combinations of pantry ingredients and this recipe proves it. With just crushed biscuits, cocoa, and condensed milk, you can create something that feels gourmet. The texture is spot on: soft and chewy outside, creamy and gooey inside. It’s perfect when you’re short on time or ingredients but still want something indulgent and homemade.
And honestly, these fudge bombs rival the texture of baked brownies or molten cakes. They hold up well, they’re portion controlled, and they’re easy to scale. Whether you make 6 or 60, the steps stay the same. It’s the kind of dessert I share with friends and they always ask for the recipe afterward.
Try adding them to a dessert board with homemade crepes, berries, and a bowl of melted chocolate or jam for dipping. Instant party platter zero oven needed!
FAQs About No Bake Fudge Bombs
Can I use any type of biscuits?
Yes! Digestive biscuits, graham crackers, or Oreos work great. Just avoid ones with fillings unless you want extra sweetness in the base.
How do I stop the filling from leaking out?
Make sure to fully seal the dough around the chocolate spread. Pinch the edges closed before rolling into a ball and chill them well before serving.
Can I make them ahead of time?
Definitely. These store beautifully in the fridge for up to 7 days and even longer in the freezer, making them perfect for prep ahead treats.
Is there a way to make them less sweet?
Use plain biscuits like digestives and reduce the amount of condensed milk slightly. You can also use unsweetened chocolate spread inside.
Can I double or triple the recipe?
Yes! This recipe scales up easily. Just keep the ratios the same and mix in a large bowl. Perfect for parties, holidays, or gift boxes.
Want more quick dessert ideas? Follow us on Facebook for daily sweet recipes and behind the scenes kitchen tips!