Nothing beats the smell of freshly baked bread wafting through a warm kitchen. After years of baking loaves that took hours to rise and required precision timing, I stumbled across a method that changed everything: how to make 20 minute homemade bread. It’s a recipe I now keep in my back pocket quick enough for weeknights, reliable enough for guests, and satisfying every single time. The beauty of this bread is that it skips yeast entirely, meaning no rise time, no proofing, and no stress.
“Fresh bread in under 30 minutes? It’s not a dream it’s this recipe.” – @EverydayBaker
Why I Love This 20 Minute Bread
- It’s stress free: No worrying about yeast blooming or dough doubling. You just mix and bake.
- It’s pantry friendly: Every ingredient is likely in your kitchen already flour, baking powder, milk, and oil.
- It’s adaptable: I can flavor it sweet or savory depending on the mood or meal.
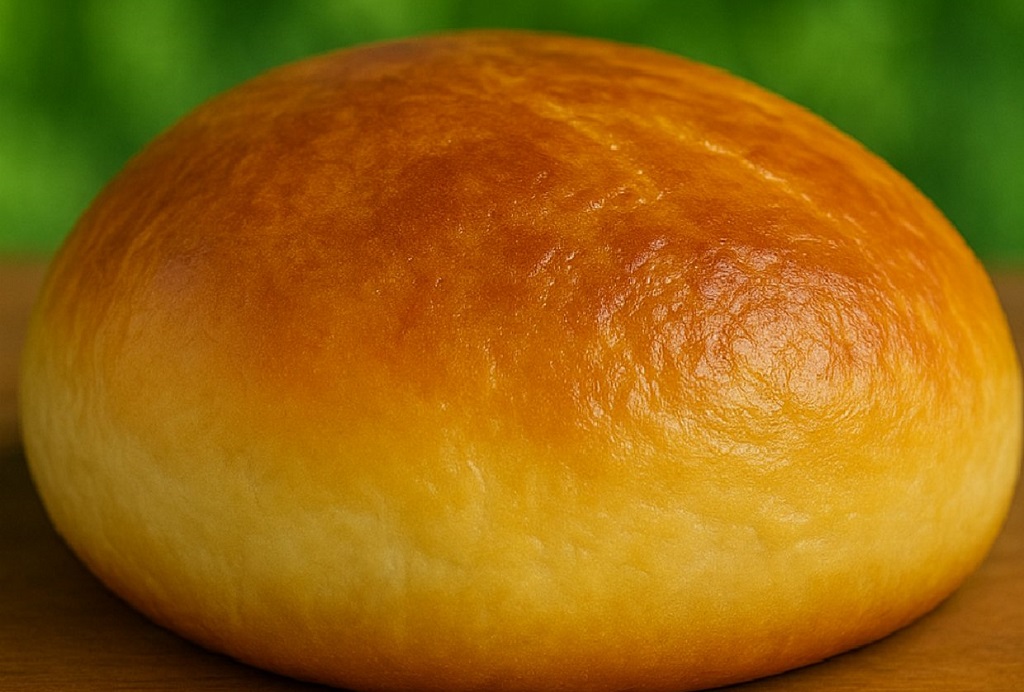
- It’s delicious: The inside is soft and tender, and the crust is golden and lightly crisped.
For anyone who’s intimidated by yeast or just short on time, this is the bread to try. It reminds me a lot of the simplicity in our 4 ingredient rolls no fuss, all flavor.

Ingredients
- 2 cups all purpose flour
- 1 tablespoon baking powder
- 1 teaspoon salt
- 1 tablespoon sugar
- 3/4 cup milk (room temperature)
- 1/4 cup vegetable oil (or melted butter)
- 1 tablespoon melted butter (for brushing)
Optional additions I sometimes include: dried herbs, shredded cheese, minced garlic, or even cinnamon sugar for a sweet spin. This bread takes seasoning beautifully.
Step by Step to Make 20 Minute Homemade Bread
1: Preheat Your Oven
- Start by preheating your oven to 375°F (190°C).
- Grease a small loaf pan or line it with parchment paper. You can also use a round baking dish or oven safe skillet.
2: Combine the Dry Ingredients
- In a medium mixing bowl, whisk together the flour, baking powder, salt, and sugar until evenly distributed.
- This helps prevent clumps and ensures even rise across the loaf.
3: Mix in the Liquids
- Pour in the milk and vegetable oil directly into the bowl with your dry mix.
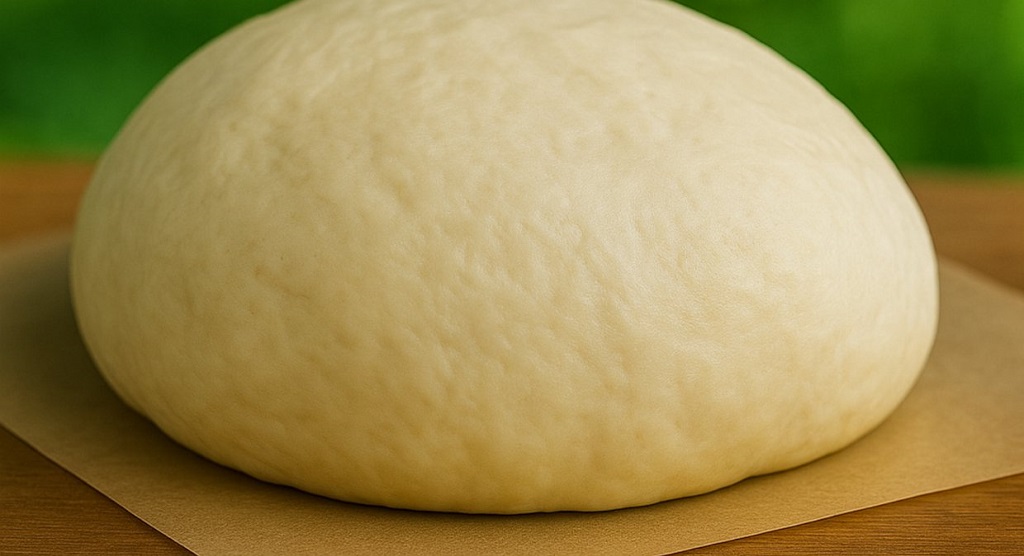
- Using a spatula or wooden spoon, stir until everything is just combined. The dough will be shaggy, thick, and a little sticky.
- Do not overmix. This is a quick bread overworking the dough makes it dense.
4: Shape and Transfer
- Scoop or pour the batter into your prepared baking pan and use the back of a spoon to smooth the top.
- It won’t rise much before baking, so it’s okay if the dough looks compact at this stage.
5: Bake
- Place in the oven and bake for 18 to 22 minutes, depending on your oven. I usually check it at the 15 minute mark.
- When a toothpick inserted into the center comes out clean and the top is lightly golden, it’s ready.
6: Brush with Butter
- As soon as it comes out of the oven, brush the top generously with melted butter.
- This adds flavor and helps keep the crust soft and supple.
7: Let It Rest
- Allow the bread to cool in the pan for about 5 minutes before transferring it to a cooling rack.
- Slice while warm or let it cool completely for cleaner cuts.
“The moment you cut into that golden loaf and hear the soft crackle you’ll never go back to store bought.” – @KitchenRushChef
How I Personalize This Bread
I love recipes that give me room to play, and this one is perfect for that. Depending on the meal, I’ll adapt the base to suit the flavor profile I’m aiming for. Here’s how I’ve switched it up:
- Garlic and Herb: Add 1 tsp dried oregano, 1/2 tsp garlic powder, and a pinch of thyme to the dry mix.
- Cheddar Jalapeño: Stir in 1/2 cup shredded cheddar and 1 tbsp finely chopped jalapeños.
- Sweet Morning Loaf: Add 2 tbsp honey, 1/2 tsp cinnamon, and a handful of raisins for a breakfast version.
- Parmesan Crust: Sprinkle grated parmesan on top before baking for a cheesy crust.
- Everything Bagel Top: Brush with egg wash and sprinkle everything bagel seasoning before baking.
It’s similar to how I riff on homemade crepes or baked donuts once the base is right, everything else is creativity.
Why I Rely on This Recipe in My Weekly Routine
When I’m pressed for time or don’t feel like dealing with long rising schedules, this recipe saves the day. I make it at least once a week sometimes as a side for soups, other times as a stand alone snack. It’s warm, cozy, and it makes the house smell amazing without demanding hours of attention.
- Weeknight Saver: I can make this while prepping a quick dinner it’s ready when the soup is done.
- Kid Approved: My little ones love it plain or with peanut butter and jam.
- Budget Friendly: Costs next to nothing, especially compared to artisan loaves.
- No Yeast Worries: Perfect fallback when I’m out of yeast or forgot to start dough in advance.
Much like our go to microwave jar breads, this recipe was born for speed and simplicity without sacrificing flavor or texture.
How I Use This Bread Throughout the Day
What I love most about this bread is how it fits into every meal without ever feeling repetitive. Whether it’s breakfast, lunch, or dinner or just a cozy afternoon snack this bread always finds its place. It’s not just fast, it’s flexible, and that’s what makes it a staple in my kitchen.
- Morning toast: Warm slices with butter and homemade jam are the perfect start to the day.
- Midday sandwich: I slice the loaf and layer it with turkey, cheese, lettuce, and a smear of mustard. Toast it, and it’s better than deli bread.
- Soup companion: I serve it with hearty bowls of vegetable soup or cowboy soup it’s ideal for dipping and scooping.
- Afternoon snack: A drizzle of honey or a slice of cheese turns it into a filling, wholesome snack.
- Sweet dessert twist: I slice, toast, and dust with cinnamon sugar for a quick sweet bite after dinner.
This adaptability reminds me a lot of our cheesy mashed potato puffs you can reshape and remix the base to suit any occasion. It makes your kitchen feel endlessly creative without needing a complicated prep.
Make Ahead Tips That Save Me Time
Even though this bread only takes 20 minutes from start to finish, I still plan ahead when I want to bake it on autopilot. Here’s how I prepare in advance to make this bread feel effortless:
- Pre measured dry mix: I mix the flour, baking powder, salt, and sugar in a jar and label it “20 Minute Bread Mix.” It’s ready for action anytime.
- Freeze baked slices: After cooling, I slice the bread and freeze individual slices in zip top bags. I just pop one in the toaster when I need it.
- Use leftover milk: If I’ve got milk that’s a day or two from expiring, I make this bread it’s a great way to reduce waste.
This make ahead logic is the same strategy I use for larger bread loaves and egg muffins small preparations make the whole week smoother.
How to Store, Freeze, and Reheat This Bread
This bread has a soft, tender crumb that keeps well for a few days though it rarely lasts that long in my house. Still, when I double the batch or make it in advance, here’s how I keep it fresh:
- Room temperature: Store in an airtight container or bread bag. It stays soft for 2-3 days.
- Refrigeration: You can refrigerate it for up to 7 days, but the texture gets a little firm just toast to refresh.
- Freezing: Freeze slices in layers separated by parchment paper. They reheat perfectly in a toaster or 300°F oven for 5 minutes.
- Microwave tip: Wrap a slice in a damp paper towel and microwave for 10-15 seconds to bring back softness fast.
I treat this bread the same way I handle our banana bread or healthy banana oatmeal bakes slice, store smartly, and enjoy whenever the craving strikes.
Common Mistakes and How I Fix Them
Even with such a simple recipe, I’ve made enough batches of this bread to know where things can go wrong. If your loaf didn’t turn out the way you hoped, here’s what may have happened and how I’ve fixed it in my kitchen:
| Issue | What Went Wrong | My Fix |
|---|---|---|
| Bread is too dense | Overmixed the batter | Mix until ingredients are just combined no more |
| Bread didn’t rise well | Baking powder was old | Use fresh baking powder, replace every 6 months |
| Bread tastes flat | Forgot to add salt or sugar | Double check measurements before combining |
| Crust is pale | Oven temp too low or not preheated | Always preheat and use an oven thermometer for accuracy |
| Crust too hard | No butter brush after baking | Brush melted butter over the hot loaf immediately after baking |
I follow the same troubleshooting approach with every recipe, from soft doughs to moist cakes pinpoint the issue, adjust, and get better every time. That’s how I’ve turned even quick breads like this one into something reliable and pro level.
“Once you’ve baked this 20 minute bread once, you’ll start inventing reasons to make it again.” – @QuickBakeQueen
Frequently Asked Questions About How to Make 20 Minute Homemade Bread
Can I make this bread without oil?
Yes, you can substitute the oil with melted butter or even yogurt. The texture may change slightly, but it will still bake up soft and tender.
Can I use almond milk or oat milk instead of regular milk?
Absolutely. I’ve tried both almond and oat milk with great success. The flavor stays neutral, and the bread remains moist and fluffy.
Why didn’t my bread rise?
This usually means your baking powder is inactive. Make sure it’s fresh it should fizz when mixed with hot water. Also, ensure your oven is fully preheated before baking.
How can I make this bread gluten free?
You can use a 1:1 gluten free all purpose flour blend. Just note the texture may be slightly crumblier, but brushing with butter helps lock in moisture.
Can I double this recipe?
Yes. Just double all ingredients and bake in two pans, or use a larger loaf pan. You may need to increase the baking time by 5-7 minutes. Always check with a toothpick.
Can I shape this dough into rolls?
Yes! Use an ice cream scoop to form small rounds and place them on a greased tray. Bake at the same temperature for about 15 minutes until golden.
What’s the best way to reheat leftovers?
I like to wrap slices in foil and place them in a 300°F oven for 5-7 minutes. For a softer texture, microwave a slice wrapped in a damp paper towel for 10-15 seconds.