Are you searching for a show-stopping centerpiece for your child’s next birthday party? Consider a Paw Patrol Cake! These vibrant and fun cakes delight kids who love the adventures of Chase, Marshall, Skye, and the rest of the Paw Patrol gang.
This article will guide you through various designs and provide baking tips. It will also explore some DIY decorating ideas to help you create the perfect cake. Are you ready to unleash your creativity? Let’s dive in!
- Introduction to Paw Patrol Cake Creations
- Planning Your Paw Patrol Cake
- Step-by-Step Baking Guides
- Decorating Tips and Techniques
- DIY Paw Patrol Cake Ideas
- Alternative Paw Patrol Themed Treats
- Common Challenges and Troubleshooting
- FAQs
- What are the best cake flavors for a Paw Patrol cake?
- How far in advance can I make a Paw Patrol cake?
- How do I store a fondant-decorated Paw Patrol cake?
- What is the best way to transport a Paw Patrol cake?
- Can I craft a Paw Patrol cake sans fondant?
- How do I ensure my Paw Patrol cake decorations are safe to eat?
- What are some simple Paw Patrol decorating ideas for beginners?
Introduction to Paw Patrol Cakes
What is a Paw Patrol Cake?
A Paw Patrol Cake is a fun dessert based on the kids’ TV show ‘Paw Patrol.’ The show features young rescue dogs, each with their own unique traits.
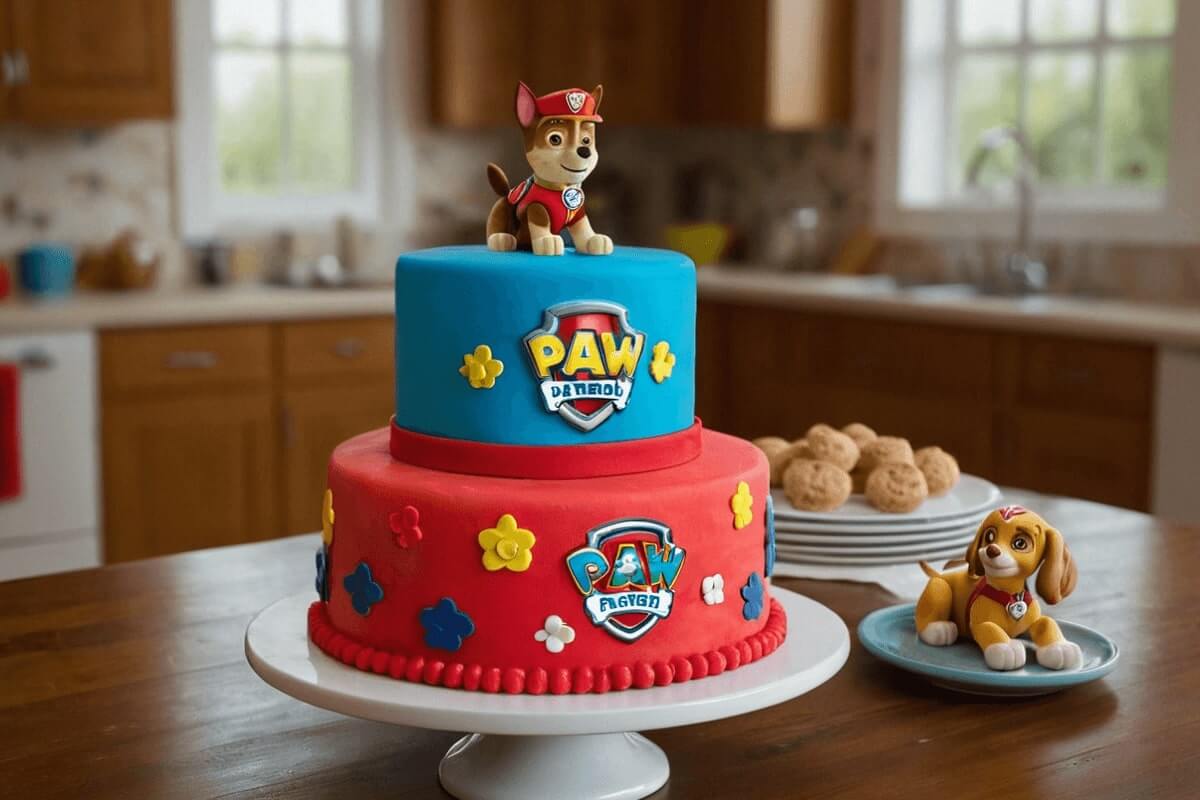
These characters are perfect for cake designs. You can choose between a large three-layer cake with all the dogs or a simple cake with just one dog. Either option will be exciting and fun.
A Paw Patrol Cake is perfect for any size party, from small family gatherings to big birthday bashes, and kids will love it. Let’s now explore how to choose the right design that will have everyone’s tails wagging!
Choosing a Design
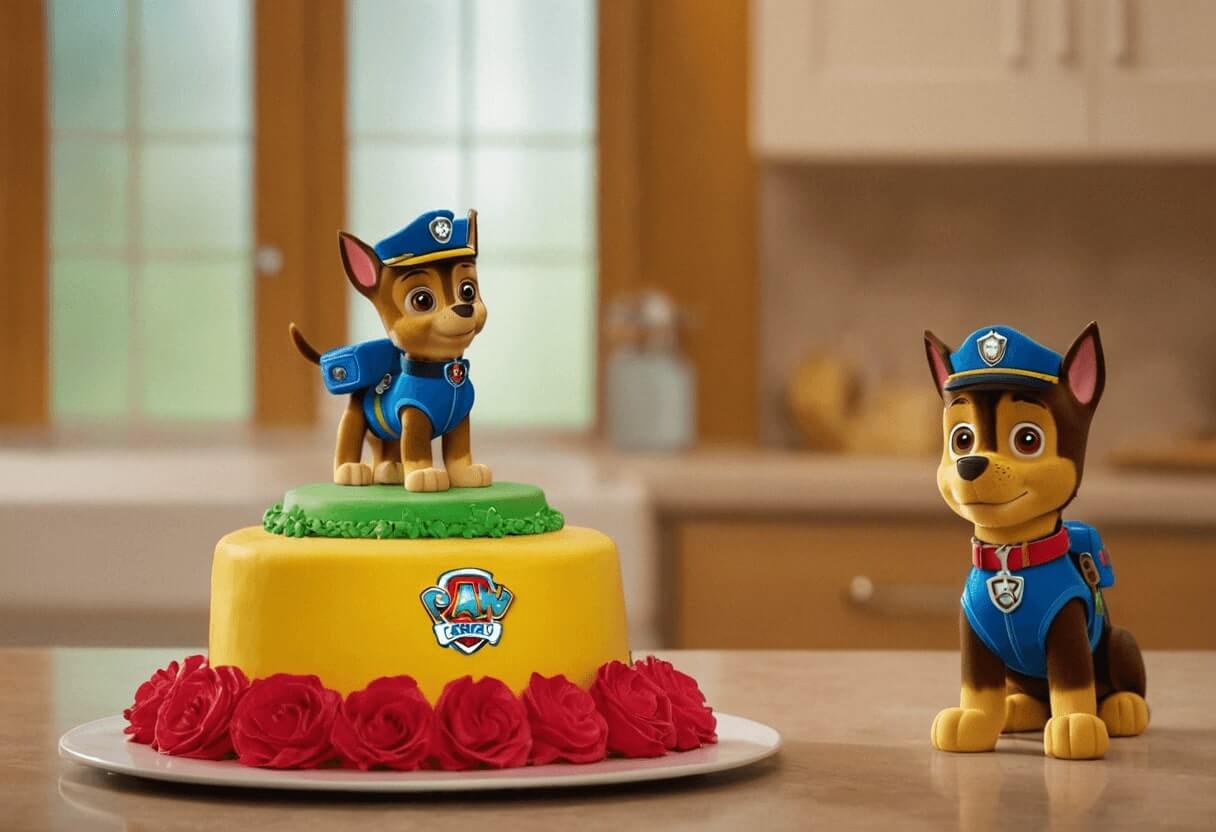
Picking the right design for your Paw Patrol Cake involves a few considerations. Firstly, think about your child’s favorite character. Is it Marshall with his fire-fighting gear, Chase the police pup, or Skye the pilot? Each character can take center stage on the cake, surrounded by decorations that highlight their unique tools and vehicles.
Secondly, consider the level of complexity you’re comfortable with. Do you want to craft intricate fondant figures, or would you prefer simple icing designs? You have many choices, from detailed cakes with the Lookout Tower to simple sheet cakes with pictures of the pups.
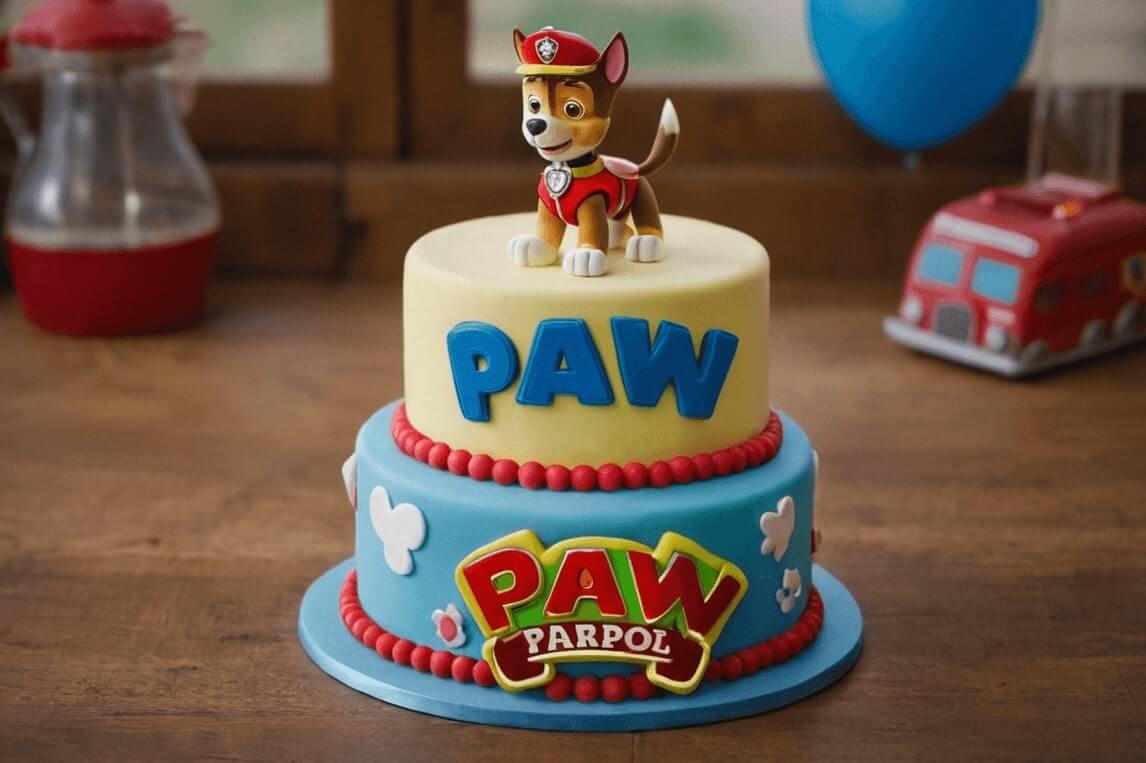
Let the show’s vibrant colors inspire you. Use bright blues, reds, and yellows to mirror the lively spirit of “Paw Patrol.” This not only makes the cake visually appealing but also faithful to the energetic ethos of the show.
Selecting Ingredients and Tools
To create a memorable Paw Patrol Cake, you’ll need the right ingredients and tools. Here’s a quick checklist:
- Ingredients: Start with a solid base like a vanilla or chocolate sponge cake. These popular flavors provide a perfect canvas for colorful decorations. You’ll need fondant to make figures, buttercream icing for a smooth look, and bright food coloring to make the characters pop.
- Tools: A rolling pin for fondant, cutters for detailed shapes, a palette knife for icing, and piping bags for detailed work are essential. Additionally, consider using character molds if you’re not confident in your sculpting skills.
Now that you have your design and materials ready, it’s time to start the fun part—baking and decorating your Paw Patrol Cake. Stay tuned as we explore the baking process in the next section to ensure your cake is not only spectacular but also scrumptious!
Planning Your Paw Patrol Cake
Choosing a Design
When you plan your Paw Patrol Cake, start by picking a design that your child loves and that reminds them of their favorite parts of the show. Are they thrilled by Marshall’s firefighting adventures or Chase’s police missions? Maybe they love Skye’s aerial escapades! Picking a character as the centerpiece of your cake can personalize the experience and make the party memorable.
But why stop at one character? For a truly spectacular cake, consider creating a scenic depiction that includes multiple members of the Paw Patrol team. Imagine a cake layered like Adventure Bay, with fondant figures of the pups positioned around their iconic vehicles. Such a design requires more time and effort but the smiles it will bring are well worth it!
Selecting Ingredients and Tools
The next step in planning is gathering your ingredients and tools. The right supplies can make the difference between a cake that’s merely good and one that’s absolutely paw-some.
Ingredients:
- Cake Mix: Whether you choose to go homemade or use a boxed mix, opt for flavors that are a hit with kids, like chocolate or vanilla.
- Frosting: Buttercream is versatile for both covering and decorating. For vivid colors, gel food coloring provides intensity without watering down the mixture.
- Fondant: This is essential for creating detailed character figures and decorative elements. You can color fondant with food coloring to match the bright colors of Paw Patrol.
Tools:
- Fondant Rolling Pin: Essential for rolling out smooth, even sheets of fondant.
- Cutting Tools: Various cutters and sculpting tools will help you shape fondant into detailed figures and decorations.
- Piping Bags and Tips: For intricate icing details that add texture and depth to your design.
Equipped with the right design, ingredients, and tools, you’re well-prepared to start the baking process. However, before you preheat your oven, it’s crucial to envision the entire process from baking to decorating. Planning ahead will save you time and help avoid any last-minute party panics.
Gathering Inspiration and Ideas
A great way to find inspiration is to look at ideas online. Platforms like Pinterest offer a wealth of creative ideas and visual references for Paw Patrol Cakes. From simple designs featuring a single pup to elaborate landscapes depicting scenes from the show, the possibilities are endless. Looking at pictures can help you decide on your design and make sure you have everything you need to start.
Remember, the goal is to create a fun and festive atmosphere that celebrates your child’s love for Paw Patrol. With a good design and everything you need ready, you’re all set to make a cake that will be the star of the party. Next, we’ll go through the baking process step by step to make sure your Paw Patrol Cake tastes as great as it looks!
Step-by-Step Baking Guides
Baking the Cake
Creating a Paw Patrol Cake starts with a solid foundation. Here’s a simple guide to baking a strong cake base that can hold all your creative decorations.
Preparing Your Batter:
- Choose Your Flavor: Vanilla and chocolate are perennial favorites. Whichever you select, ensure the flavor will delight your partygoers.
- Mixing the Ingredients: Follow your recipe or cake mix instructions to the letter for the best results. This typically involves combining your dry and wet ingredients separately before mixing them together.
- Preparing the Pans: Grease your cake pans and line them with parchment paper to prevent sticking. This step helps your cakes turn out smoothly and maintains their shape.
- Baking: Pour the batter into your prepared pans and smooth the top with a spatula. Bake in a preheated oven according to the recipe’s directions. To check if the cake is fully baked, insert a toothpick or cake tester. It should come out clean when you poke it in the middle of the cake.
Cooling and Levelling:
Once baked, let the cakes cool in the pans for about 10 minutes before transferring them to a wire rack. This will prevent them from becoming soggy. After the cake cools down, use a cake leveler or a serrated knife to make the tops flat. This helps the layers stack neatly and keeps your cake level.
Creating Fondant Characters
With your cake baked and cooled, it’s time to bring the Paw Patrol crew to life with fondant. This part of the process allows for creativity and personalization in your cake design.
Coloring the Fondant:
- Divide and Color: Divide your fondant into batches based on the number of colors you need for your characters. Color each batch with gel food coloring to match the vibrant hues of the Paw Patrol team.
Sculpting the Figures:
- Shape and Form: Begin by shaping the basic body parts of your chosen characters—bodies, heads, legs, and accessories. Use reference images to get the proportions right.
- Adding Details: For facial features and smaller details, use smaller tools like toothpicks or fine-tipped sculpting tools. These details will bring your characters to life, making them well-known and delightful.
- Assembling: Attach parts together using a dab of water or edible glue. Allow the figures to harden slightly, which will help them maintain their shape when placed on the cake.
Assembling the Cake
The final step before decorating is assembling your cake layers.
- Stacking Layers: Spread a layer of frosting between each cake layer to bind them together. This not only adds flavor but also keeps the cake moist.
- Crumb Coating: Spread a fine coat of icing evenly across the surface of the cake. This first layer of icing catches loose crumbs and seals them in, helping to make the top icing layer neat and smooth.
- Chilling: Place the cake in the refrigerator for at least 30 minutes after crumb coating. This firms up the frosting and makes the final layer of icing easier to apply.
You’ve baked your cake, created the characters, and stacked the layers. Now, get ready for the best part: decorating your Paw Patrol cake. Keep reading for tips and techniques that will make your cake a colorful celebration of your child’s favorite characters!
Decorating Tips and Techniques
Decorating your Paw Patrol Cake is where all your planning and preparation come to life. This stage transforms a simple cake into a vibrant, thematic masterpiece that will captivate and delight your party guests. Here are some tips and techniques to help you achieve a professional-looking cake.
Applying a Final Coat of Frosting
Before you begin adding the detailed decorations, ensure your cake has a smooth, flawless base.
- Final Frosting Layer: Apply a generous layer of buttercream frosting over the chilled crumb coat. Use a spatula to spread it evenly, smoothing out any bumps or imperfections.
- Smoothing Techniques: For an ultra-smooth finish, use a cake scraper or bench scraper to even out the frosting. Rotate the cake as you scrape the sides to maintain a consistent thickness and texture.
Decorating with Fondant
Fondant is flexible and great for making detailed designs, like Paw Patrol characters, paw prints, or the Lookout Tower.
- Rolling Out Fondant: Lightly dust your surface with powdered sugar or cornstarch to prevent sticking. Roll out the fondant to a thickness of about 1/8 inch for covering and decorating the cake.
- Covering the Cake: If you want a smooth finish, just cover the entire cake with a sheet of rolled-out fondant. Then, gently smooth it with your hands and cut off any extra fondant around the bottom.
- Creating Decorative Elements: Use cookie cutters for simple shapes like stars, circles (paws), or badges. For more detailed designs like the characters’ badges or accessories, hand-cut the shapes using a precise knife or fondant tools.
Adding Character Details
Placing your pre-made fondant characters and decorative elements is like putting the final pieces of a puzzle together.
- Positioning Characters: Arrange the characters strategically around the cake, ensuring they are balanced and prominently displayed. You can circle the base with them or place them on top, depending on your cake’s design and height.
- Securing Decorations: Use a small dab of frosting or edible glue to attach each piece securely to the cake. This ensures they stay in place throughout your event.
Color Schemes and Presentation
Choosing the right color scheme is crucial for capturing the essence of the Paw Patrol theme.
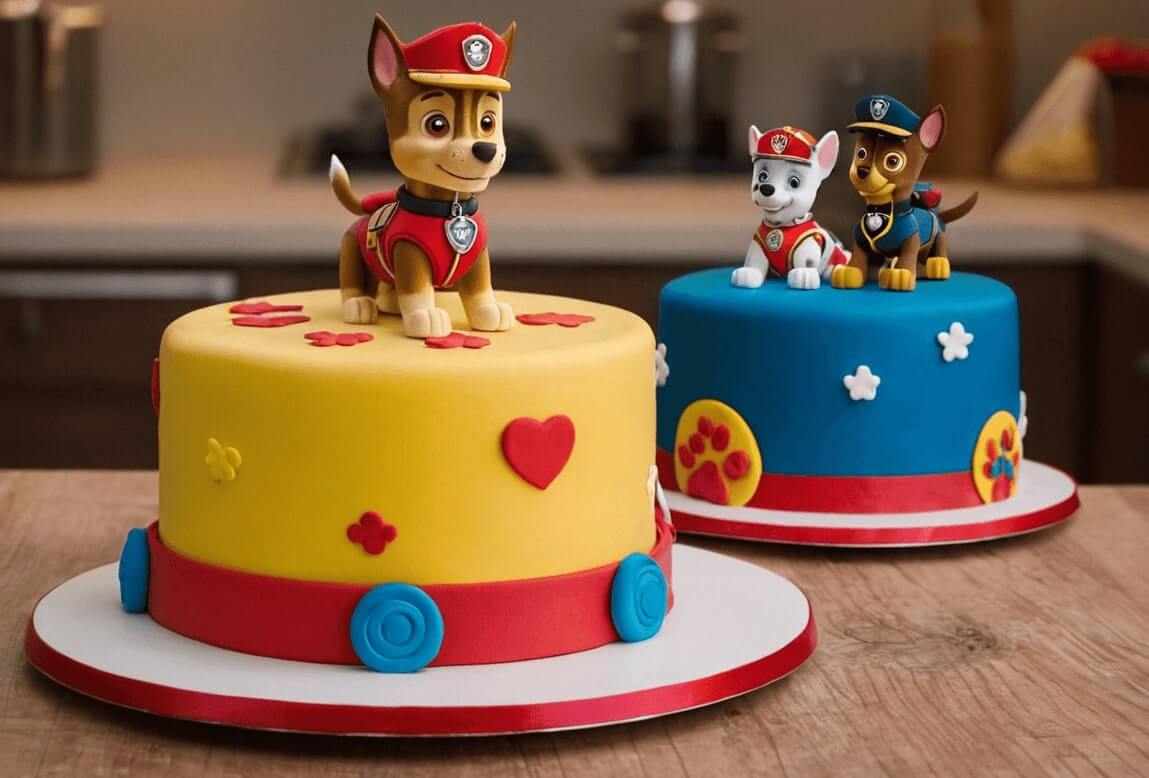
- Theme Colors: Use the main colors of the Paw Patrol characters—red for Marshall, blue for Chase, and pink for Skye, among others. These bright, bold colors make the cake pop and are instantly well-known to fans of the show.
- Finishing Touches: Add a border of piped frosting along the base and top edges of the cake to frame your design. Think about adding some edible glitter or sugar pearls to give the cake a little sparkle and make it feel more festive.
With these decorating tips, your Paw Patrol Cake will not only look stunning but will also be a fitting tribute to the beloved show. Every part, from the smooth frosting to the detailed fondant figures, combines to make a beautiful and tasty dessert. Next, explore both simple and complex DIY ideas that will make your cake extra special and tailored to your child’s unique imagination.
DIY Paw Patrol Cake Ideas
Creating a Paw Patrol Cake from scratch can be a fun and rewarding DIY project. Whether you’re new to baking or have lots of experience, these ideas will help you create a cake that’s both beautiful and right for your skills.
Simple DIY Ideas
If you’re a beginner or short on time, these easy DIY ideas quickly bring a Paw Patrol theme to your cake.
Character Silhouettes
- Easy Cut-Outs: Use character silhouette templates to cut shapes out of colored fondant. Apply these silhouettes to the sides of the cake for a clean, modern look that’s incredibly easy to execute.
- Highlight with Piping: Outline each silhouette with piped icing to define the characters and add depth to the design.
Edible Images
- Photo Finish: Purchase edible Paw Patrol images online or from a local baking supply store. You can simply put these on top of your frosted cake and add more decorations like stars or dots for a festive look.
- Custom Touches: Enhance the cake’s uniqueness by piping a personal message or name around the edible images.
Advanced DIY Ideas
If you like a challenge and have more time for decorating, these advanced ideas will let you use your creativity.
Multi-Tiered Thematic Cake
- Build Layers: Create a multi-tiered cake with each layer dedicated to a different Paw Patrol character. Decorate each tier in colors matching the pups, like red for Marshall’s fire trucks or pink for Skye’s helicopters.
- Structural Elements: Add structural elements such as bridges or towers made from gum paste or fondant, which support additional decorations or small figurines.
Interactive Elements
- Hidden Surprises: Bake a Piñata cake where cutting into the cake reveals a shower of themed candies and small treats. This is especially popular with children and adds an element of surprise to your party.
- Moving Parts: Consider using a rotating cake stand to show different scenes or characters all around the cake. This can be particularly engaging as it allows guests to view all aspects of the cake’s design.
Tips for DIY Cake Decorating
- Plan Ahead: Sketch your design and plan your color palette before you start. This will save you time and ensure that your final product is cohesive.
- Practice Makes Perfect: If you’re trying new techniques, practice on a small scale before attempting them on the actual cake.
- Keep It Fun: Remember, the goal is to celebrate with a fun and festive cake. Don’t stress over minor imperfections; they add character and homemade charm to your creation.
DIY cake decorating can be as simple or as elaborate as you choose. Whether you choose simple designs with just outlines or elaborate multi-tiered cakes, your Paw Patrol Cake will be a big hit. Next, we’ll go over some common issues you might encounter and give tips to help make your baking smooth.
Alternative Paw Patrol Themed Treats
While a Paw Patrol Cake is usually the centerpiece, a variety of themed treats will enhance the party even more. Here are some delightful alternatives that are sure to be a hit at any party.
Paw Patrol Cupcakes
Cupcakes are great for any party, giving a easy-to-handle option that kids love.
- Decorative Toppers: Use fondant to create small Paw Patrol badges or pup faces that can top each cupcake. Decorate each cupcake with a different character, using colors and symbols like fire trucks for Marshall or anchors for Zuma.
- Flavor Variety: Offer different flavors like chocolate, vanilla, and strawberry to ensure there’s something for every guest. Color the frosting in bright Paw Patrol colors to match the vibrant theme of the party.
Paw Patrol Cookies
Decorated cookies are another fantastic treat that can double as a take-home favor for guests.
- Character Shapes: Use cookie cutters shaped like the Paw Patrol characters or relevant items from the show, such as bones or paw prints. Decorate with royal icing to bring out details like the pups’ uniforms and tools.
- Packaging: Package them in clear bags tied with a themed ribbon, or display them on a stand as part of your party decor.
Paw Patrol Pupcorn
A clever twist on popcorn, “Pupcorn” can be a playful snack for guests to munch on during the party.
- Flavor Stations: Set up a station where kids can add their own toppings to plain popcorn. Offer sweet options like chocolate drizzle, rainbow sprinkles, or savory choices like cheese powder.
- Themed Servings: Serve the Pupcorn in colorful paper cones or Paw Patrol themed cups to keep with the party’s theme.
Themed Fruit and Veggie Platters
Including healthy options into your party menu doesn’t have to be boring. You can creatively arrange fruit and veggie platters to match the theme.
- Creative Arrangements: Set up vegetables to look like a dog bone or use cookie cutters to make fruit into paw prints and other shapes.
- Dip Options: Provide a variety of dips to encourage kids to enjoy their veggies. Include options like hummus, ranch, or a yogurt dip for fruits.
Themed Beverages
Keep the pups hydrated with fun and festive drinks that fit the Paw Patrol theme.
- Colorful Punches: Offer fruit punches in the colors of the Paw Patrol characters—red for Marshall, blue for Chase, and so on. Put each character’s name and picture on the corresponding punch.
- Decorative Straws: Adorn straws or cups with Paw Patrol stickers, or opt for cups shaped like the characters, available at party stores.
These themed treats make your party look better and ensure there’s something everyone can enjoy, no matter their age or diet. Next, we’ll wrap up with some final thoughts and tips to make your Paw Patrol party a howling success!
Common Challenges and Troubleshooting
Planning a Paw Patrol themed party and baking the cake may include challenges, such as baking mishaps or last-minute decorating snags. Here are some common issues you might encounter along with practical solutions to help keep your party planning on track.
Cake Does Not Rise
One of the most frustrating issues in baking is when a cake doesn’t rise as expected, leaving you with a flat or dense product.
- Check Your Leavening Agents: Check that your baking powder or baking soda hasn’t expired. These ingredients lose their effectiveness over time, which can affect the rise of your cake.
- Oven Temperature: Make sure your oven works properly and heats evenly. An oven that’s too hot or too cold can affect how your cake bakes.
Fondant Figures Melting or Deforming
Fondant can be tricky to work with, especially in warm climates or during hot weather.
- Keep It Cool: Try to work in a cool environment or use a fan to keep the area chilled. Fondant holds up better in cooler temperatures.
- Fondant Hardener: Use a little tylose powder mixed into your fondant to help it set and hold its shape better.
Frosting Too Runny or Too Stiff
Getting the consistency of frosting right is crucial for a good cake decoration.
- Adjust Consistency: If your frosting is too runny, add more powdered sugar to thicken it. If it’s too stiff, gradually mix in small amounts of milk or cream until you achieve the desired consistency.
- Temperature Control: Keep your frosting covered and at room temperature. If it’s too warm, the butter or fat within can melt, making it runny.
Decorations Not Sticking
Sometimes decorations might slide off or not stick well, which can be annoying, especially when you’re finishing your cake.
- Edible Glue: To keep decorations in place on fondant or buttercream, use a little edible glue or some icing. This helps ensure they stay in place.
- Position Carefully: Place heavier decorations lower on the cake or support them with hidden skewers or toothpicks.
Running Out of Time
Decorating a detailed cake like a Paw Patrol cake takes a lot of time, and you might find yourself running out of it.
- Plan Ahead: Break the decorating process into stages, and complete as much as you can in advance. You can prepare fondant decorations days in advance and put them on the cake at the last minute.
- Simplify the Design: If you’re short on time, consider simplifying the design. Focus on key elements that capture the theme without involving intricate detail work.
Final Touch-Up Tips
Before your party guests arrive, give your cake and decorations a final check.
- Last-Minute Fixes: Have extra frosting and fondant on hand for any quick repairs or touch-ups.
- Presentation: Keep your cake in a cool, shaded spot to stop it from melting or the colors from fading.
Plan for potential issues and prepare solutions to ensure your Paw Patrol party and cake are highlights of a smooth event.
FAQs
Organizing a Paw Patrol themed party and creating a spectacular cake can bring up several questions. Here are some frequently asked questions and their answers to help you navigate the process smoothly.
What are the best cake flavors for a Paw Patrol cake?
- Popular Choices: Vanilla and chocolate are classic favorites that are generally well-received by all age groups. For a more adventurous option, consider strawberry, lemon, or funfetti, which are especially popular among younger guests.
- Allergy-Friendly Options: If you know some guests have dietary restrictions, offer options like gluten-free or vegan so everyone can have a piece of cake.
How far in advance can I make a Paw Patrol cake?
- Baking the Cake: You can bake the cake layers 2-3 days in advance. Once cooled, wrap them tightly in plastic wrap and store them in the refrigerator until you’re ready to decorate.
- Decorating: You can make fondant decorations several days ahead and add them to the cake closer to the time of the party. It’s best to assemble and frost the cake one day before the event to keep everything fresh.
How do I store a fondant-decorated Paw Patrol cake?
- Temperature Considerations: Store your fondant-decorated cake in a cool, dry place away from direct sunlight. Unlike buttercream, fondant does not need refrigeration and can actually become sticky and melt if stored in the fridge.
- Ahead of Time: If you need to store the cake overnight, cover it with a cake keeper or an upside-down large bowl to protect it from dust and keep it from drying out.
What is the best way to transport a Paw Patrol cake?
- Secure Base: Place the cake on a sturdy cake board that is at least 2-3 inches larger than the cake itself. This provides a stable base and makes it easier to lift and move the cake.
- Level Surface: Transport the cake in a flat, level area of your vehicle, such as the trunk or floor. Avoid placing it on a seat, as the slant can cause the cake to slide.
- Driving Tips: Drive slowly and avoid sudden stops or sharp turns to prevent the cake from shifting or sliding.
Can I craft a Paw Patrol cake sans fondant?
- Alternative Decorations: Create a stunning Paw Patrol cake using buttercream, piping gels, and edible paper for straightforward designs. Techniques like the star tip for fur textures or smooth icing for a sleek look are great alternatives to fondant.
How do I ensure my Paw Patrol cake decorations are safe to eat?
- Edible Materials: Use only food-grade materials for your cake decorations. Fondant, gumpaste, edible colors, and glitters are safe options. Always avoid or remove non-edible decorations before serving the cake.
What are some simple Paw Patrol decorating ideas for beginners?
- Silhouettes and Edible Images: For a simple yet effective design, use silhouettes of the Paw Patrol characters or edible printed images. Place them on the icing and add simple decorations like paw prints or bones made with cookie cutters around them.
With these FAQs addressed, you should feel more confident in creating and presenting a Paw Patrol themed cake. Remember, the key to a successful cake is planning ahead and enjoying the process. Happy baking, and hope your Paw Patrol party is fun and full of great memories!