

A soft loaf of homemade bread makes everyday sandwiches and toast feel a little more special. This Amish White Bread has a tender, lightly sweet crumb, a golden crust, and a shape that slices neatly. The dough uses water and vegetable oil rather than milk, and one batch makes two generous 9-by-5-inch loaves.
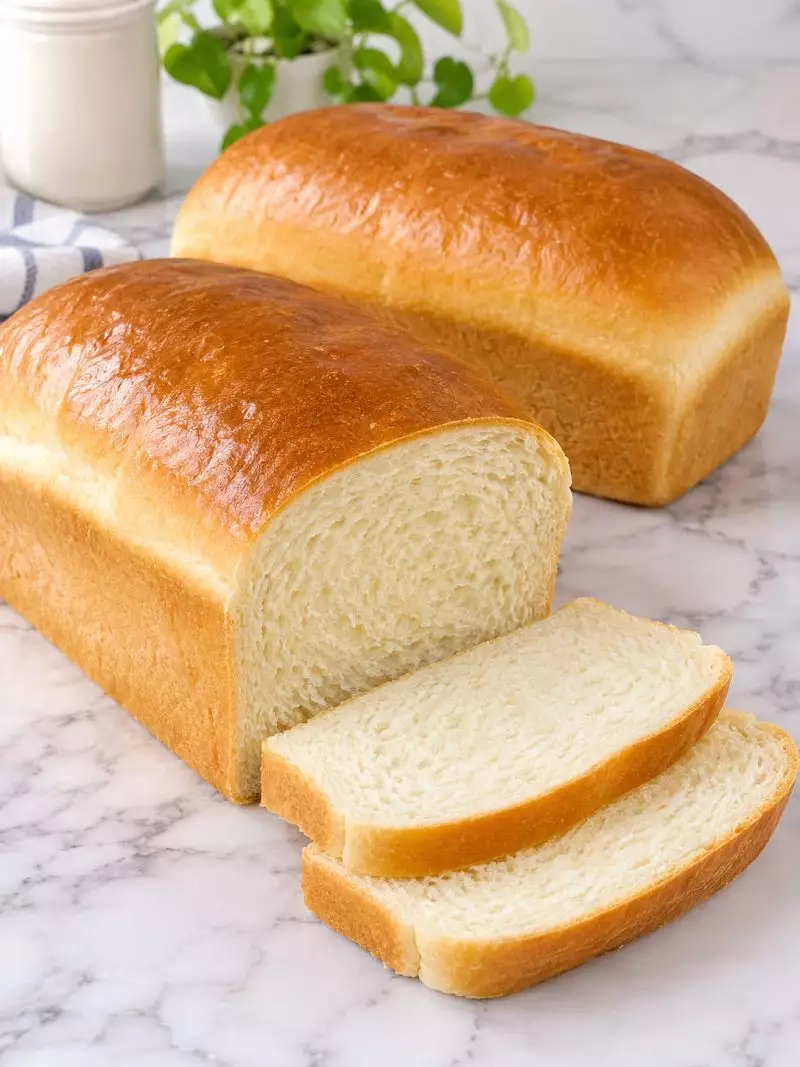
Allow about 3 hours and 20 minutes from beginning to slicing, including rising and cooling. You can knead by hand or use a stand mixer. The important part is learning what the dough should feel and look like at each stage.
What Makes This Bread Soft and Easy to Slice?
Three details make the biggest difference: measured flour, developed dough, and a tightly shaped loaf.
- Water, sugar, and oil: Water hydrates the flour, sugar gives the bread its characteristic sweetness, and vegetable oil contributes tenderness.
- Proper kneading: Kneading develops the elastic structure that holds the gas produced by yeast. The finished dough should feel smooth, elastic, and slightly tacky.
- Careful shaping: Rolling each dough portion into a firm cylinder helps create an even sandwich crumb instead of leaving large internal gaps.
This is a water-based white bread, not a milk-enriched loaf. If you want to explore that difference, compare it with our fluffy Japanese milk bread, which belongs to a different bread style.
Amish White Bread
A lightly sweet, soft white sandwich bread made with water, vegetable oil, active dry yeast, and bread flour. Makes two golden 9-by-5-inch loaves with a tender, sliceable crumb.
Ingredients
- 2 cups water 480 ml; warm to 110–115°F (43–46°C) for activating the yeast
- 2/3 cup granulated white sugar 133 grams total; divide into 1 tablespoon (12 grams) for yeast activation and the remaining 121 grams
- 1 1/2 tablespoons active dry yeast 14 grams; equivalent to two standard 1/4-ounce packets
- 1 1/2 teaspoons fine sea salt 9 grams; fine-grain salt
- 1/4 cup neutral vegetable oil; 60 ml or About 55 grams
- 6 cups unbleached bread flour; 750 grams
- 2 tablespoons unsalted butter 28 grams; melt shortly before the loaves finish baking and use for brushing the hot crusts
- 1 teaspoon neutral vegetable oil For lightly greasing the bowl before the first rise; separate from the 1/4 cup of oil measured
- vegetable oil spray or additional butter
Instructions
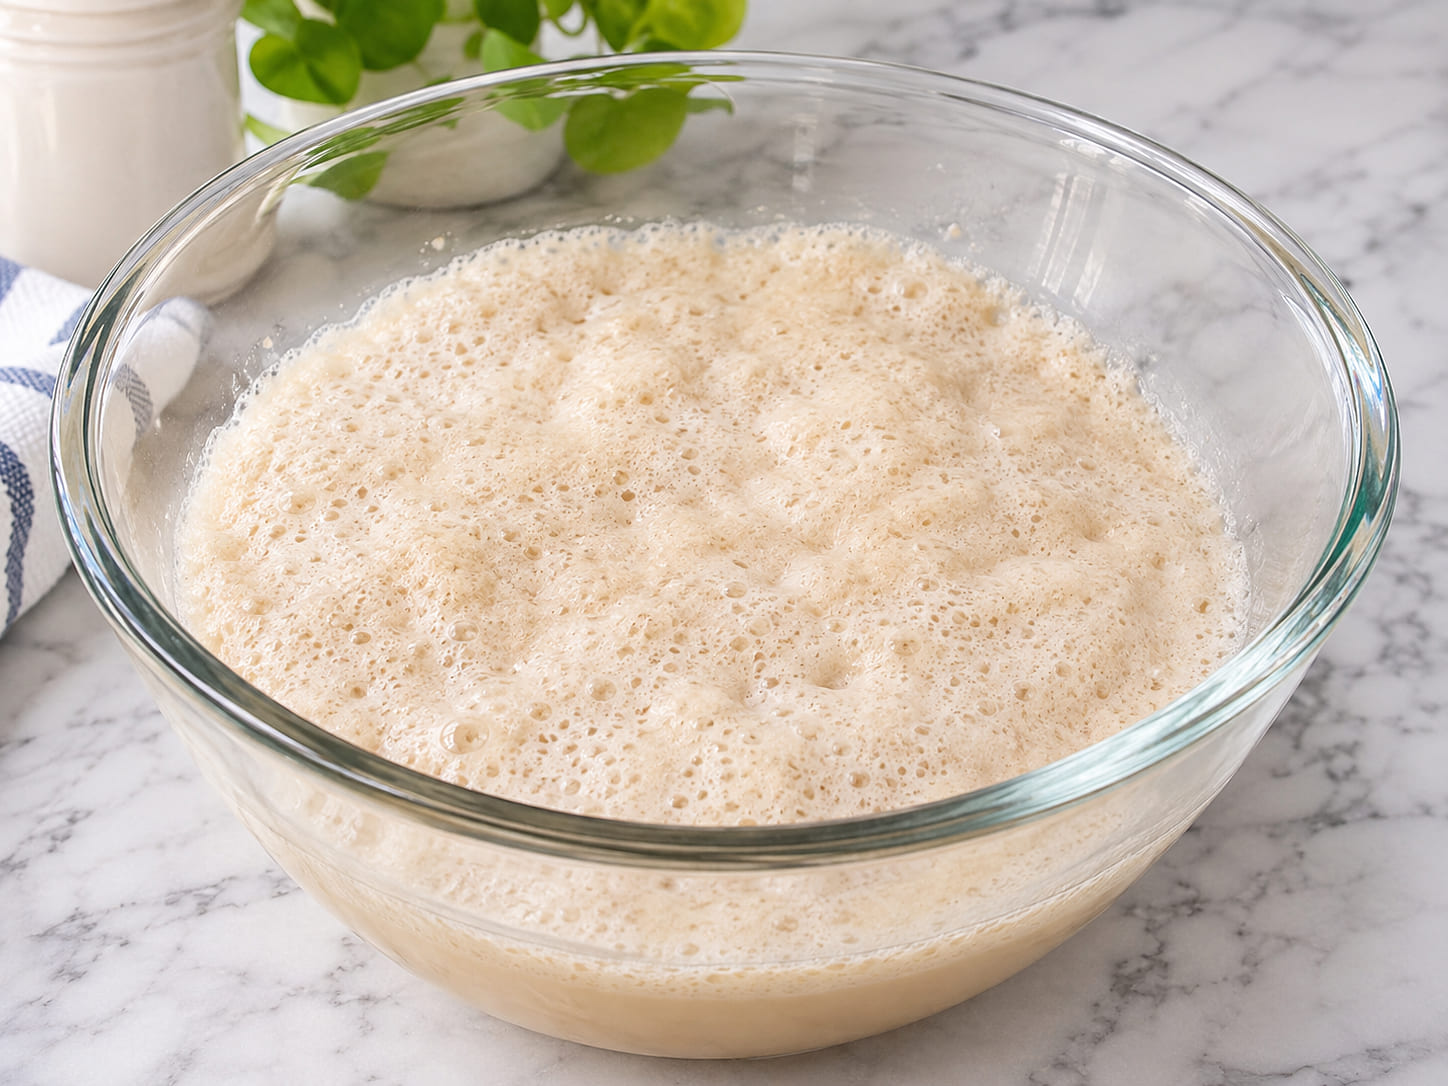
- Measure the water and check that it is 110–115°F (43–46°C). Pour it into a large mixing bowl or the bowl of a stand mixer. Stir in exactly 1 tablespoon (12 grams) of the measured sugar until dissolved. Sprinkle the active dry yeast evenly over the water. Leave undisturbed for 7–10 minutes. The yeast is ready when a thick, creamy foam develops across the surface. If the mixture remains flat with no visible activity, check the yeast and water temperature before proceeding. Reserve the remaining 121 grams of sugar for the next step.
- Add the remaining sugar, fine sea salt, and 1/4 cup neutral vegetable oil to the activated yeast mixture. Stir for about 30 seconds to distribute the ingredients evenly. Keep the sugar and oil measurements for the dough separate from the ingredients used to grease the bowl and pans.
- Add 3 cups (375 grams) of bread flour to the liquid mixture. Stir vigorously with a wooden spoon or mix with the paddle attachment on low speed for 1–2 minutes, until a thick, wet mixture forms. Add the remaining 3 cups (375 grams) of flour gradually, about 1 cup at a time. Continue mixing until the flour is absorbed and the dough forms a shaggy, cohesive mass that begins pulling away from the sides of the bowl. Avoid adding the reserved dusting flour unless needed for handling.
- For a stand mixer, switch to the dough hook and knead on speed 2 for 6–8 minutes. For hand kneading, turn the dough onto a lightly floured work surface and knead for 10–12 minutes using a push, fold, and quarter-turn motion. Use only a little of the reserved flour if sticking prevents handling. The finished dough should be smooth, elastic, supple, and slightly tacky rather than dry. To check gluten development, stretch a small piece gently; it should form a thin, translucent membrane before tearing. The nominal active-preparation allowance uses the longer hand-kneading method.
- Shape the kneaded dough into a smooth ball. Lightly coat a large bowl with 1 teaspoon of neutral vegetable oil, then add the dough and turn it once to coat the surface. Cover with plastic wrap or a damp, clean towel. Leave in a draft-free location at approximately 75–80°F (24–27°C) for about 60 minutes, or until doubled in volume. Use the change in dough volume rather than the clock as the deciding sign.
- Gently press down the risen dough to release large gas pockets. Turn it onto a clean, unfloured work surface. Use a bench scraper to divide it into two equal portions, weighing the actual dough if a scale is available. The owner notes describe approximately 715 grams per portion, but equal division of the actual dough takes priority. Cover the portions loosely with a clean towel and let them rest for 5 minutes to relax the gluten.
- Lightly grease two 9-by-5-inch metal loaf pans with vegetable oil spray or butter. Working with one dough portion at a time, press it into an approximately 8-by-12-inch rectangle, gently removing large air pockets. Starting at the short 8-inch edge, roll the dough tightly into a compact cylinder, maintaining even tension without tearing the surface. Pinch the long bottom seam firmly closed and tuck both ends underneath. Place the cylinder seam-side down in the center of a prepared pan. Repeat with the second portion.
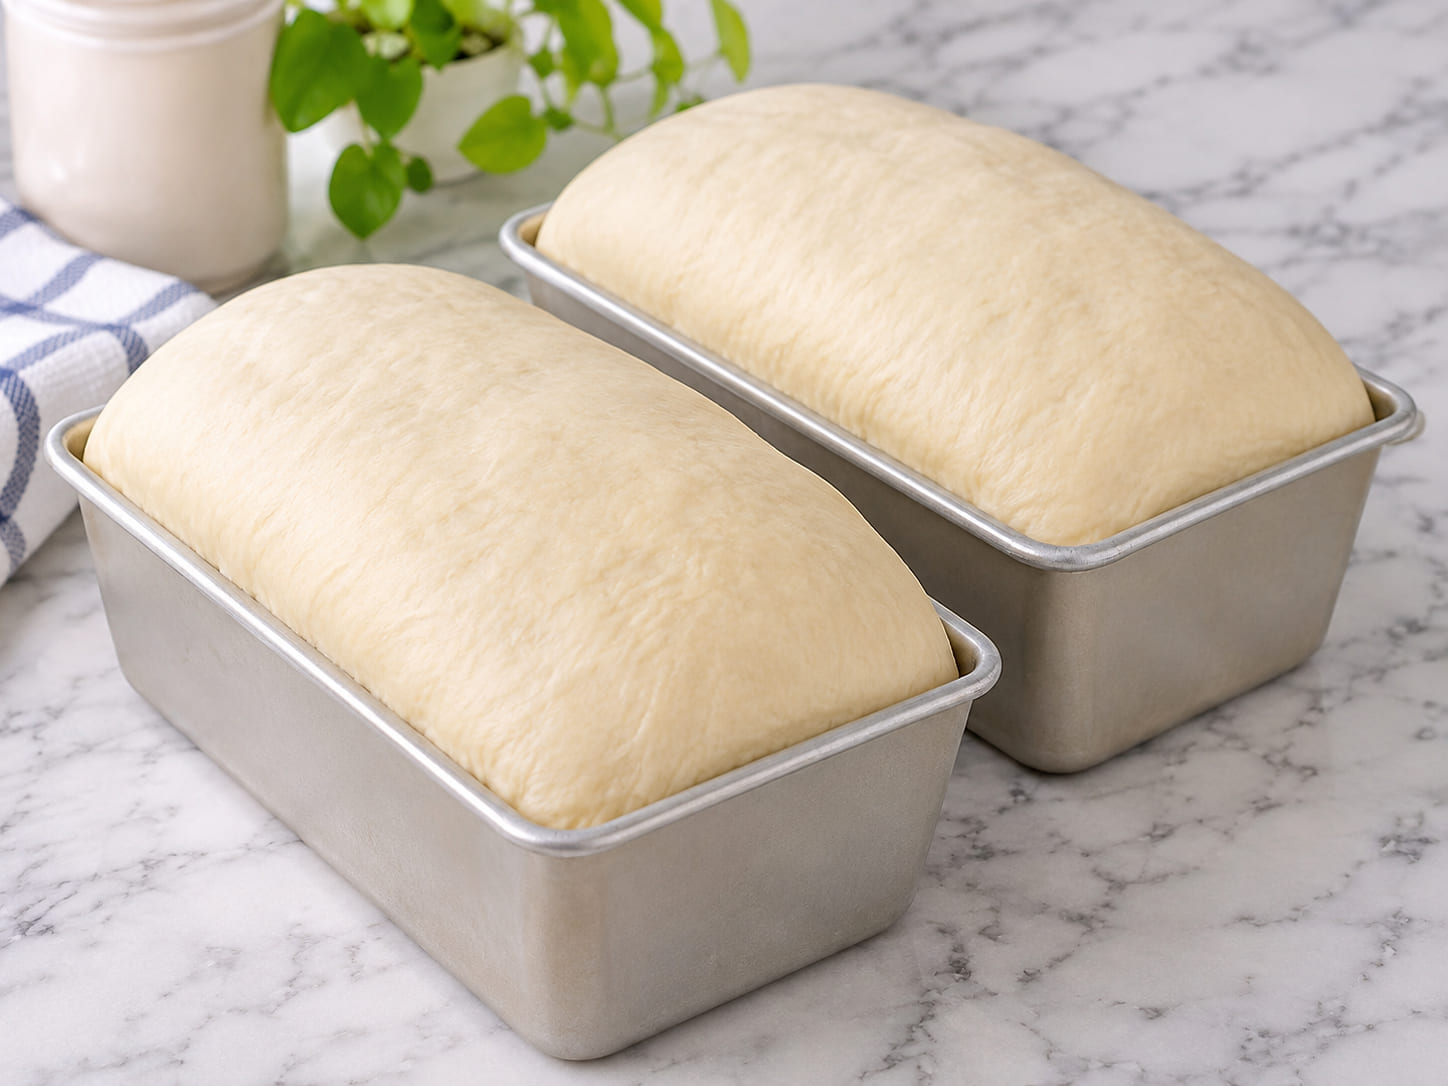
- Cover the pans loosely with a clean, lightweight towel or plastic wrap lightly coated on the dough-facing side to prevent sticking. Let the shaped loaves rise at warm room temperature for approximately 35 minutes. They are ready for baking when the rounded dough crowns stand about 1 inch above the pan rims. Do not continue proofing substantially beyond this point. During the latter part of this rise, preheat the oven to 350°F (175°C) in conventional bake mode, with one rack in the center.
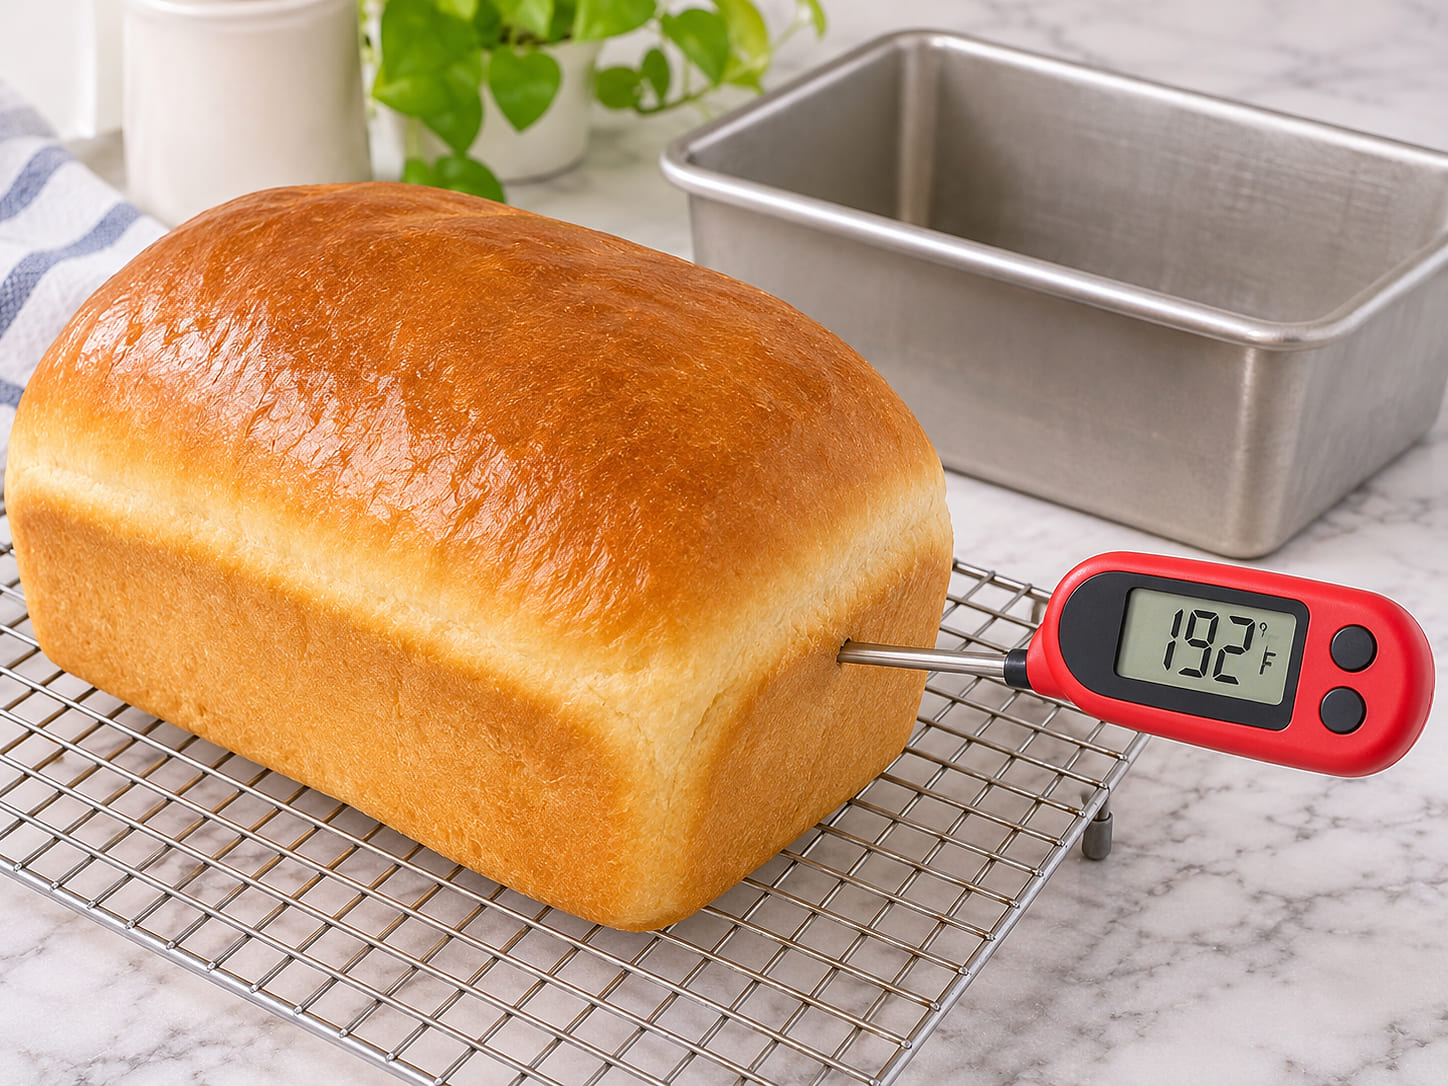
- Remove the covers and place both loaf pans on the center oven rack. Leave 2–3 inches between the pans and at least 2 inches between each pan and the oven walls. Bake at 350°F (175°C) for approximately 30 minutes, until the crowns are evenly deep golden brown and the sides are set. Insert an instant-read thermometer horizontally through the side of a loaf toward its center. The internal temperature must reach 190–195°F (88–90°C). If the center is below 190°F (88°C), continue baking for another 3–5 minutes and check again. Repeat as needed until the approved doneness range is reached. A hollow sound when the loaf bottom is tapped is a supporting cue, not a substitute for the temperature reading.
- Remove the baked loaves from the oven and set the pans on a wire rack. Immediately brush the hot top crusts with the 2 tablespoons of melted unsalted butter, dividing it evenly between the loaves. Leave the bread in its pans for 10 minutes. Carefully turn out both loaves and place them upright on the wire rack for at least another 25 minutes. Allow additional cooling if the centers remain noticeably warm before slicing, so the crumb can set and the slices hold their shape. The scheduled cooling allowance is 35 minutes in total.
Notes
- Planning time: 35 minutes preparation, 100 minutes resting and rising, 30 minutes baking, and 35 minutes cooling, for a total of 200 minutes. Actual rising and cooling needs may vary.
- The 100-minute rest allowance covers approximately 60 minutes for the first rise, 5 minutes for the covered bench rest, and 35 minutes for the final proof.
- Measure the main bread flour as 750 grams. The optional additional 30 grams is for light dusting, not part of the primary dough formula.
- The sugar is divided: 1 tablespoon goes into the yeast-activation water, and the remainder is added afterward.
- For all-purpose flour, substitute 750 grams unbleached all-purpose flour for the bread flour. The crumb may be softer, with less oven spring.
- For a honey variation, replace the sugar with 2/3 cup (225 grams) honey, reduce the water by 2 tablespoons (30 milliliters) to 450 milliliters, and use 1 tablespoon of honey during yeast activation.
- For a different dough fat, replace the 1/4 cup vegetable oil with an equal volume of melted unsalted butter cooled to about 85°F (29°C), or melted coconut oil. Keep the finishing butter separate.
- Store completely cooled bread at room temperature in a bread bag or box for 3–4 days. Avoid refrigerating.
- Freeze cooled, sliced bread in sealed freezer bags for up to 3 months. Thaw as needed or toast directly from frozen.
- Nutrition values are supplied estimates per slice, based on 24 slices from two loaves.
Nutrition Information
- Calories 168 kcal
- Carbohydrate Content 31 g
- Cholesterol Content 2.5 mg
- Fat Content 3.0 g
- Fiber Content 1.1 g
- Protein Content 4.2 g
- Saturated Fat Content 0.4 g
- Serving Size 1 slice (approximately 50 grams).
- Sodium Content 147 mg
- Sugar Content 5.8 g
- Trans Fat Content 0 g
Before You Start: Three Details That Matter
Measure the Flour Before Adjusting the Dough
The main recipe uses 6 cups (750 grams) of unbleached bread flour. Weighing the flour is particularly helpful because a tightly packed measuring cup can add more than intended.
As the flour goes in, expect a rough, shaggy dough before kneading. After kneading, it should be smooth and elastic but still slightly tacky. Resist the temptation to keep adding flour until the surface feels completely dry. The additional 1/4 cup (30 grams) is available for light dusting, not as an automatic addition to the dough.
If you’re building confidence with homemade dough, our bread-making technique guide provides another useful look at handling and developing yeast dough.
Give the Yeast a Gentle Start
Use water at 110–115°F (43–46°C) and dissolve only 1 tablespoon of the measured sugar in it before adding the active dry yeast. The remaining sugar belongs in the dough after the yeast has bloomed.
After 7–10 minutes, look for a thick, creamy layer of foam. This visible activity is more useful than watching the clock alone. If the surface stays flat and inactive, check the yeast and water temperature before continuing.
Know When Kneading Is Finished
A stand mixer with a dough hook takes about 6–8 minutes at speed 2; kneading by hand takes about 10–12 minutes. Use the texture to confirm readiness. The dough should stretch rather than tear immediately, and a small piece should pull into a thin, translucent membrane, often called a windowpane.
If it tears quickly, continue kneading and check again. A rough surface at the beginning is normal; a smooth, elastic surface is the goal before the first rise.
Shape Two Even Sandwich Loaves
Once the first rise has doubled the dough, gently press out excess gas and divide it into two equal portions. Give the pieces a covered 5-minute rest so they are easier to shape.
For each loaf, press the dough into an approximately 8-by-12-inch rectangle. Roll tightly from a short edge, keeping the cylinder even rather than leaving loose pockets. Pinch the seam closed, tuck the ends underneath, and place the loaf seam-side down in its greased 9-by-5-inch pan.
The seam belongs underneath the loaf, not across the top. A snug roll supports an even crumb and reduces the chance of large tunnels appearing when you slice the finished bread.
Watch the Rise, Not Just the Timer
For the first rise, cover the dough and keep it in a warm place around 75–80°F (24–27°C). About 60 minutes is the planning estimate, but the dough should approximately double in size before you shape it.
For the second rise, the shaped dough should crown about 1 inch above the pan rim. This often takes around 35 minutes. Preheat the conventional oven to 350°F (175°C) during this stage.
Do not rely on the suggested minutes if the dough is clearly behind or ahead. A cool room can slow fermentation, while a warmer environment can speed it up. The dough’s actual expansion tells you when to proceed.
How to Know the Bread Is Fully Baked
After approximately 30 minutes in the oven, the loaves should be deeply golden with a set crust. Color is helpful, but the center temperature provides a more dependable check.
Insert an instant-read thermometer horizontally through the side of a loaf toward its center. Look for 190–195°F (88–90°C). If the center is below 190°F, return the bread to the oven for another 3–5 minutes, then check again.
A hollow sound when tapping the loaf can support your judgment, but it should not replace the temperature check.
Brush the hot loaves with the measured melted butter for a softer finished crust. Let them stand in their pans for 10 minutes, then move them to a rack for at least another 25 minutes. If the centers still feel warm, allow more cooling before slicing. Cutting too soon can compress the tender crumb and leave it gummy.
Useful Ingredient Substitutions
- All-purpose flour: Replace the 750 grams of bread flour with 750 grams of unbleached all-purpose flour. Expect a softer crumb and potentially a little less oven spring.
- Honey instead of sugar: Use 2/3 cup (225 grams) honey and reduce the water by 2 tablespoons (30 milliliters), leaving 450 milliliters of water. Use 1 tablespoon of the honey for yeast activation and add the remainder afterward.
- Butter or coconut oil in the dough: Replace the 1/4 cup vegetable oil with an equal volume of melted unsalted butter cooled to about 85°F (29°C), or melted coconut oil. Keep the separate 2 tablespoons of melted butter for brushing the finished crust.
These are approved formulation options, but changes in flour or fat can affect the finished texture. Use the same dough-readiness and proofing cues rather than assuming the dough will behave identically.
If you enjoy a different flavor profile, our honey buttermilk bread offers another homemade loaf to explore.
Common Problems and How to Prevent Them
The Dough Feels Heavy or Stiff
Too much flour may be responsible. Check that the main flour quantity is 750 grams and that extra flour was used only for light dusting. The properly kneaded dough should remain slightly tacky rather than dry and rigid.
The Bread Has Large Holes Inside
Loose shaping can leave pockets between layers of dough. Next time, press the dough into an even rectangle, roll it tightly from the short edge, and seal the seam before placing it underneath in the pan.
The Loaf Is Dense
Check the earlier stages: the yeast should foam during activation, the kneaded dough should stretch elastically, and the first rise should approximately double the dough. Insufficient development or a rise stopped too early can contribute to a dense crumb.
The Crust Browns Before the Center Is Ready
Check the center with a thermometer instead of removing the bread based only on color. If it reads below 190°F, continue baking in short 3–5-minute intervals and check again.
Storage and Freezing
Let the loaves cool completely before storing them. Keep bread in a bread bag or bread box at room temperature for about 3–4 days. Avoid refrigeration, which can make bread stale faster.
For longer storage, slice the cooled loaves and seal the slices in freezer bags for up to 3 months. Thaw the slices as needed or toast them directly from frozen.
Two loaves also give you flexibility: keep one for sandwiches and freeze the other in slices. If you prefer smaller portions for the table, our soft and fluffy Amish dinner rolls are a related option.
More Homemade Bread Guidance
For a broader introduction to bread and biscuit techniques, visit The Complete Guide to Homemade Biscuits & Breads. It connects this sandwich loaf with other dough styles and baking methods.
Frequently Asked Questions
Why is Amish white bread sweeter than ordinary sandwich bread?
This recipe uses 2/3 cup (133 grams) granulated sugar for two loaves, giving the finished bread a noticeably sweet but still sandwich-friendly flavor. Only 1 tablespoon of that sugar is used when activating the yeast; the remainder goes into the dough.
Can I use all-purpose flour instead of bread flour?
Yes. Replace the 750 grams of bread flour with 750 grams of unbleached all-purpose flour. The finished bread may have a softer crumb and slightly less oven spring. Knead until the dough is smooth and elastic, and use the rise cues rather than relying only on the clock.
Why did my Amish white bread sink after baking?
A loaf that sinks may have risen beyond its ideal proofing point or may not have developed enough structure. For this recipe, finish the second rise when the dough crowns about 1 inch above the pan rim, and knead until it passes the windowpane check. Before removing the bread from the oven, verify that its center reaches 190–195°F (88–90°C).
Why does homemade bread become gummy when sliced warm?
The crumb is still setting as the bread cools. Cutting while the center is warm can compress the soft interior and make slices seem gummy. Cool these loaves in their pans for 10 minutes, then on a wire rack for at least another 25 minutes. Wait longer if they are still warm before slicing.
Save This Recipe
Enter your email below and we'll send the link straight to your inbox. You'll also get fresh baking recipes each week.
More From Biscuits & Breads



You Might Also Like





Amazing tips -thanks.
the voice telling you what the ingredients are are not the same amount s written here which one is right
Thank you for pointing out the discrepancy, Judith. We apologize for the confusion. Please follow the written ingredient quantities on the recipe page for accuracy. We’ll review the audio component to ensure it matches the written recipe.
Can you half the recipe and use a bread machine?
Hi Lyle, yes, you can definitely halve the recipe and use a bread machine. Simply divide all the ingredients in half and follow your bread machine’s instructions for a 1-pound loaf. Keep in mind that you may need to adjust the yeast amount slightly, as bread machines can be more efficient at mixing and proofing. Happy baking!